3. Choose Database Connection:  
5. Go back and create a new connection, this time, choose SOA-MDS Connection:
  Now, under the Resource Palette, you will notice the SOA-MDS connection under IDE Connections:  Referencing DVMs (through attributes or XSL)
Fault bindings in composite.xml
Schema or WSDL import
|
Showing posts with label JDeveloper. Show all posts
Showing posts with label JDeveloper. Show all posts
Friday, May 11, 2012
Creating an MDS connection through JDeveloper 11g
########

How to setup MetaData Store (MDS) for Weblogic 11g in Jdeveloper
SOA
Suite 11g has a provision for sharing SOA artifacts through MDS – Meta
Data Store. This facilitates greater re-use of SOA artifacts such as
XML Schemas, EBMs, WSDLs, Fault Policies, Rule repositories and Service
Data Objects (SDOs) among others. MDS can be file-based or
database-based. Here are the steps to create and use Databased and
file-based MDS in JDeveloper.
MDS
is created under <jdeveloper-home>/integration/seed directory.
Default folder “soa” is used to store common system soa artifacts. All
custom artifacts are supposed to be stored under a folder called
“apps”, since this folder already exists in server.
Create directory structure under apps folder. In my case, I’ve created folder structure ../apps/cosdeaia/ApplicationConnectorServiceLibrary to store XML schema files. This ideally should match your schema structure.
1. First you go to your local 11g Jdeveloper installation folder. In my case it is C:\JDEV_HOME11.1.1.3\jdeveloper\integration\ folder (if you have already applied third party plugin patch provided by oracle then you will see seed folder by default with all previous configuration done). If not create a seed folder under integration folder.
2. Now create folder with name apps under seed (remember to create folder with name apps else you might face issue this oracle documents say i didn’t try out).
3. Under apps you can create your folder structure to place all your XSD, WSDL files.
4. We can create a SOA_MDS connection in Jdeveloper as below -
New Connections — > SOA-MDS Connection 5. The SOA-MDS connection can be created in two ways. One is File Based MDS and other is Data Based MDS. 5. The SOA-MDS connection can be created in two ways. One is File Based MDS and other is Data Based MDS.
6. In Create SOA_MDS Connection window, select File Based MDS as Connection Type
for file based MDS connection, we will point to the local folder in
our system where all the WSDL and XSD files are placed as
shown below. So when we use the wsdl and xsd files in the
project, they will be referred from the local system.

7. Click OK. Now the File Based MDS connection is created.
8. Lets see how to create DB based MDS connection. In Create SOA_MDS Connection window, select DB Based MDS as Connection Type for file based MDS connection.
 9. For DB Based MDS
connection, we should have created all the schema for the weblogic in
the database by running the Repository Creation Utility (RCU) wizard.
After RCU execution, the DEV_MDS schema will get created in the
database. We need to use the DEV_MDS schema connection and soa-infra as MDS Partition while creating the DB Based MDS connection as shown in the above screen shot. 9. For DB Based MDS
connection, we should have created all the schema for the weblogic in
the database by running the Repository Creation Utility (RCU) wizard.
After RCU execution, the DEV_MDS schema will get created in the
database. We need to use the DEV_MDS schema connection and soa-infra as MDS Partition while creating the DB Based MDS connection as shown in the above screen shot.
10. Click OK. Now the DB Based MDS connection is created.
11. So when we use the wsdl and xsd files
in the project, they will be referred from the local system. But when
we deploy the application into Weblogic server, the wsdl and xsd file
references will be missing. To avoid this we need to use an Ant script and import all the WSDL and XSD files into Weblogic server.
12. You use common sca tool (common-sca-tools.xml) to do it and use Ant target name importCommonServiceArtifactsIntoMds from class files provided by oracle (MDSImportTask).
13.
So whenever we made modifications or additions to the WSDL or XSD
files, we need to update the Weblogic server. While update, by using
an Ant script first delete all the files from Weblogic server and execute re-import Ant script the latest files into Weblogic server.
14.
After Import into Weblogic server, you can use the wsdl and xsd files
in your project by referring to the Weblogic server through SOA-MDS
(Data Based MDS) connection type. But never Copy these files into your project while referring from Weblogic server. By
copying this creates a mess in run time. For example while working
you do some modifications in the local WSDL and XSD files and you will
forgot to update these changes in to Weblogic server.
15. Whenever we refer the WSDL or XSD files from SOA-MDS (Data Based MDS) connection type, the location URL looks like oramds:/apps/cosdeaia/… (In my case the cosdeaia folder contains all my files…)
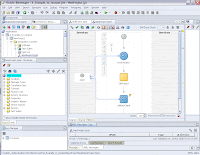
16. The new connection appears under the “Resource Pallette” window on right side of the Jdeveloper as shown below

Now you have created the MDS connection in Jdeveloper. You can use in in your SOA Composites.
|
########
How to rename BPEL project in JDeveloper
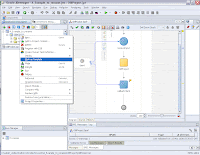
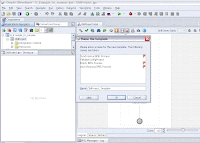
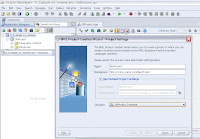
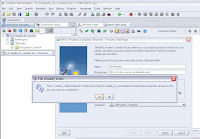
Its extremely difficult to change the process name once created in JDeveloper. |


########
Subscribe to:
Posts (Atom)